How to Change keyed Rotary Switch to Remote Control Switch?
I am looking to convert a keyed rotary switch with a remote control switch. The switch has 4 positions, position 1 is all Off. Position 2 lower
(turns on compressor) Position 3 Raise (turns on a blower) and Position 4 Drain (turns on a pump). These are turned on individually not all at the same time. The voltage required to power the remote control is AC220V. No current is required to power the devices. The relays are basically open or closed. I would like a 4 channel RF product so I have one channel spare. Can you assist me with what product suits this please.

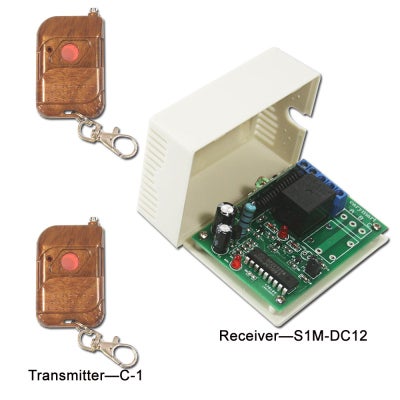
According to the descriptions from this customer, we recommend him 4 CH Relay output long range waterproof case wireless remote control kit 0020446 (S4PU-AC220-ANT3+1CB-4). Set the receiver S4PU-AC220-ANT3 with Latched mode, then connect compressor to relay 2 in the receiver, connect blower to relay 3 in the receiver, connect pump to relay 4 in the receiver. This remote control kit is composed of a 4-channel receiver and 4-button transmitter that can be used in agriculture automation, industry automation, and home automation. It can control products on land, water and air, especially in a long distance, such as business signs, motorboat, farm, pasture, offshore unmanned operation, field call, remote security alarm, unmanned aerial vehicle, etc. Connected the compressor to the relay 1 of the 4 CH receiver, connect the blower to relay 2 of the 4 CH receiver, connect the pump to the relay 3 of the 4 CH receiver.
 There are some remarkable characteristics of this 4 CH Relay output long range waterproof case wireless remote control kit.
Waterproof Function: The 4 channel receiver has waterproof connector and waterproof shell/case, so it can be installed outside.
Working Distance: With external telescopic antenna, this remote control kit can have further working distance. The working distance of the kit can reach 2000m in an open ground. If you stretches the external telescopic antenna, it can have a further working range.
Relay Output: The 4 CH receiver is relay output that can be used to operate both DC and AC equipments. The terminal is NO / NC (normally open / normally closed), which serves as a switch. That means you should also connect a separate power supply to it.
Power Output: Each relay output can work at maximum current 30A. The maximum power of the device is 3000W/110V, 6000W/220V. So it also can be used in agriculture and industry automation, such as long range and high power remote control devices.
Input control terminals: The receiver has four input control terminals, you can connect external devices, sensors, or manual switches to these terminals to control the outputs of receiver.
Three Control Modes: The 4 channel receiver has toggle / momentary / latched working control modes. We use latched control for 4 positions keyed rotary switch.
How to set working control mode?
Set toggle control mode (Press -> On; Press again -> Off): Only connect Jumper-2
Set momentary control mode (Press and hold -> On; Release -> Off): Only connect Jumper-1
Set latched control mode (Press -> On, other relays Off; Press other button -> Off): Disconnect Jumper-1 and Jumper-2
 We use 3 lamps to instead the compressor, blower and pump. Now let’s change the keyed rotary switch to remote control switch.
Material Preparation:
Receiver: S4PU-AC220-ANT3
Transmitter: CB-4
3 Lamps
A keyed Rotary Switch
Some Lines
 The Wring Diagram:
Just as the following pictures. Connect 3 lamps and 4 positions keyed rotary switch to the 4 Ch receiver. The black wire of the 3 lamps is connected and connect the other black wire to terminal “-“. Connect the red wire of 3 lamps respectively to terminal “A” of relay 1, relay 2 and relay 3. Connect red wire and black wire of the plug respectively to “+” and “-“ of the power. Please note that the red wire used to control lamp1 (compressor) should be connected to terminal A of the relay 1, the red wire used to control lamp2 (blower) should be connected to terminal B of the relay 2, the red wire used to control lamp2 (pump) should be connected to terminal B of the relay 3. The red wire used to turn off the equipments should be connected to terminal B of the relay 3.

Operation:
Press button A of the transmitter, the lamp 1 turns on.

Press button B of the transmitter, the lamp 1 turns off and the lamp 2 turns on.
 Press button C of the transmitter, the lamp 2 turns off and the lamp 3 turns on.
Press button D of the transmitter, turn off all of the lamps.

Online shop: http://www.rfcontrolsystem.com